
Camp Kitchen Setup in a Canopy: Space-Saving Tips That Make Cooking Easier
A good canopy kitchen setup can be the difference between a relaxing meal at camp and digging through tubs in the dark just to find your pan. Whether you’re just starting out or fine-tuning a setup you’ve been running for years, these tips focus on keeping it simple, functional, and fast to use—just what works.
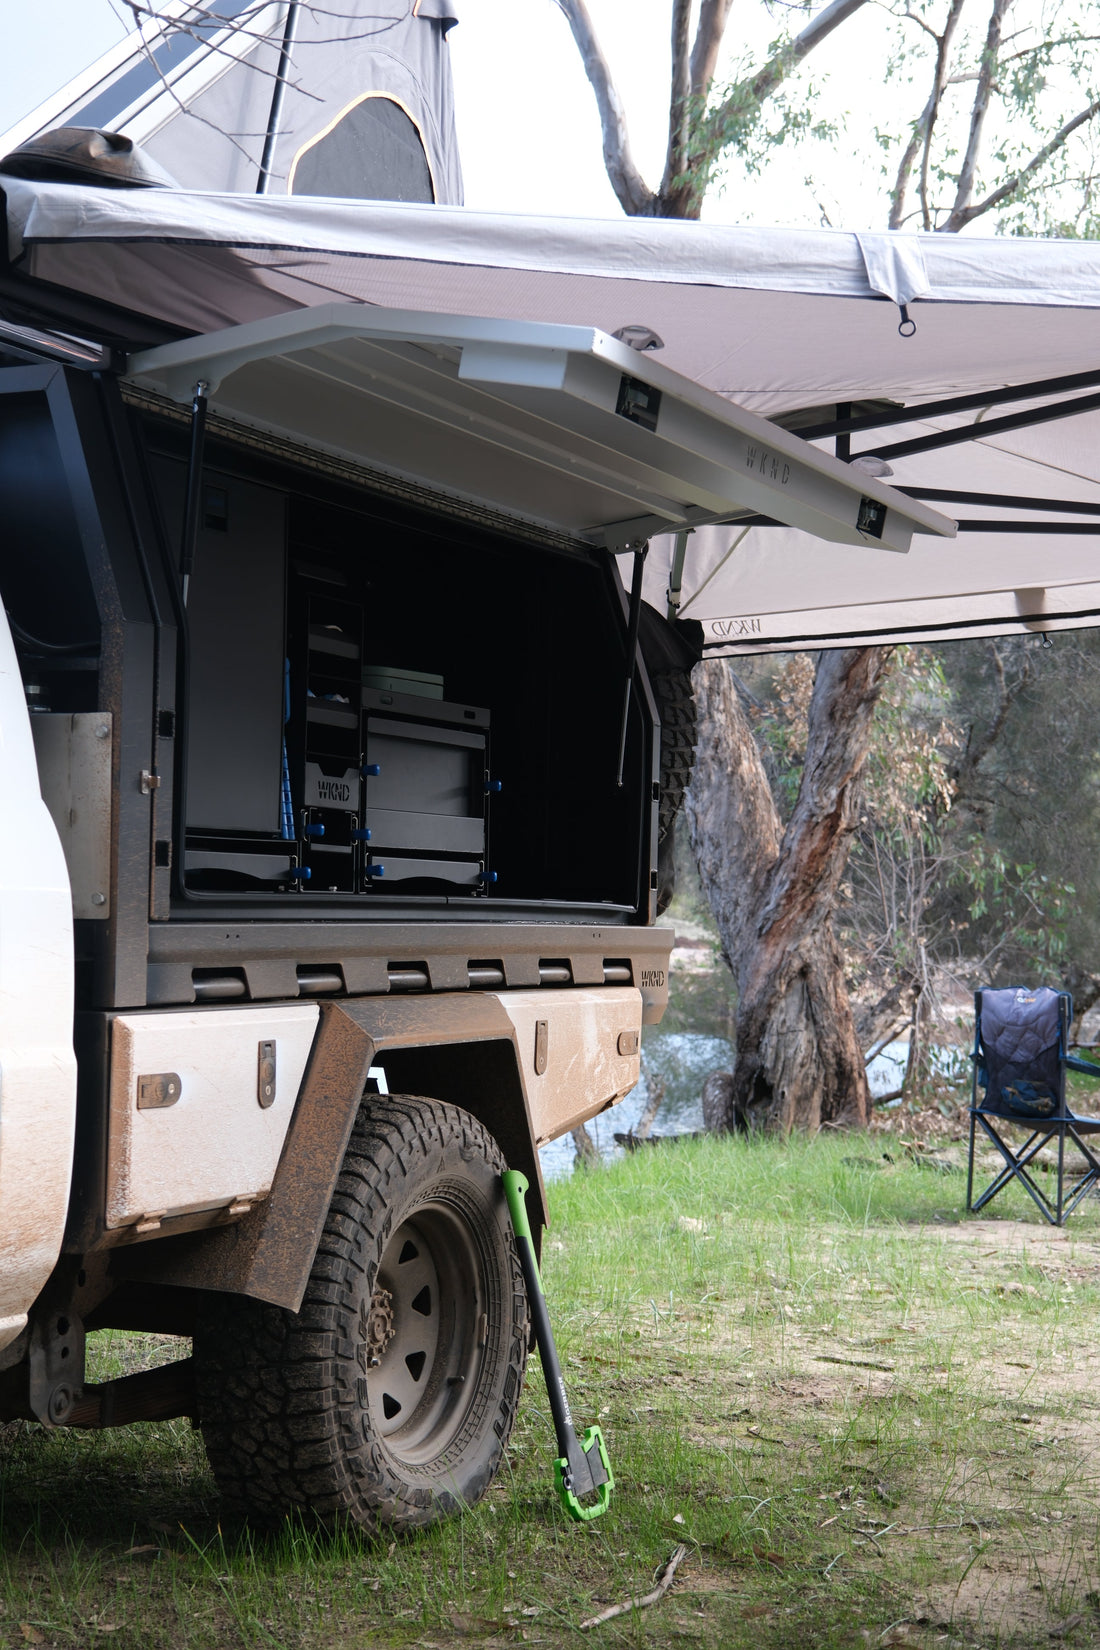
Slide-Out Kitchens vs Fixed Setups: Pros & Cons
Slide-out kitchens are a popular option for good reason—they save space, pack down neatly, and give you a solid work surface in seconds.
Fixed kitchens, on the other hand, are faster to access—everything’s right where you left it. But they do take up permanent space.
What I’ve found: If your setup needs to be versatile or you're packing for longer trips, a slide-out trumps fixed every time.
Best Spot for Your Stove and Prep Space
Don’t bury the stove at the back of your drawers. Set it up where you can get it going quickly without moving gear around. I keep mine near the rear passenger side so I can cook under the awning, prep on the drawer or table, and reach the fridge without crossing over everything.
The prep space doesn’t need to be massive—it just needs to be stable and close to the action. Bonus if it’s already clean and ready to go when you pull up.
Fridge Access Without the Pack Shuffle
This one’s critical. If you need to unpack chairs, tubs, or the dog to open the fridge—you’ll hate it after day two.
I run a small upright fridge and a separate drawer freezer. They’re mounted where you can get to them easily—without unpacking gear every time you want a drink or grab dinner.
Uprights are great for visibility—you can see everything at a glance—but they need clearance to open the door fully, so avoid mounting them too close to side walls or storage drawers. The freezer drawer should be close to your prep area, ideally somewhere it can slide out clean without blocking access to anything else.
The goal is simple: cold gear, always ready to go, whether you're at a remote camp or just pulling over for a quick lunch on the road.
Making Your Kitchen Work in All Weather
Nothing ruins a camp cook-up like sideways rain or wind blowing out your flame.
Plan your kitchen space so you can:
- Cook under cover (rear awning or side 270º)
- Reach your gear with the canopy open but not exposed to the elements
- Use wind shields around your stove
- Have a dry prep area when it's wet or muddy underfoot
Even in hot weather, shaded cooking areas make a huge difference—nobody wants to sweat over a burner in the midday sun.
Keep It All on One Side for Faster Setups
One of the best things I did was keep all my kitchen gear on one side of the canopy. That means:
- Pull up to camp
- Open one side
- Fridge, stove, drawers, prep area—all right there
It’s faster, cleaner, and you’re not walking circles around your vehicle every time you need something. If you’re setting up solo, this kind of layout makes a big difference.
Prep Table or Pull-Out Bench: Small Add-On, Big Impact
If your canopy drawer doesn’t double as a prep bench, add a fold-down or pull-out table. Even a basic aluminium surface gives you:
- A clean space to chop or plate food
- Somewhere to put hot pans that’s not on the ground
- A dry spot to prep when the ground’s wet
I run a simple table that folds out under the kitchen drawer—lightweight, no setup time, and does the job.
Awning Coverage Over Your Kitchen (and How to Handle Wind)
Your awning should fully cover your kitchen side, or at least give you enough space to cook and access your gear. A 270º awning works great for this—no poles, just shade and rain protection in under a minute.
That said, wind can wreck your plans fast. Always:
- Peg down the awning as soon as it's up
- Use guy ropes, even if it’s calm when you arrive
- Pack away the canvas if the wind picks up—it’s not worth the repair bill
A small windbreak screen or folding panel also helps keep the burner lit and the area comfortable.
Final Thoughts
A good canopy kitchen setup doesn’t need to be expensive—it just needs to be well thought-out, fast to use, and weather-ready. The less time you spend unpacking and setting up, the more time you’ve got to enjoy a proper feed at camp. Test it, tweak it, and let it evolve with your style of travel.